⚙️
Configuring Azure Integration
Last updated: 17JUL2025
Microsoft Azure App Registration
Step 1: Register the Application
Navigate to Azure Portal
- Go to portal.azure.com and sign in
- Search for "Azure Active Directory" or "Entra ID" in the search bar
- Select "Azure Active Directory" from the results
Access App Registrations
- In the left navigation pane, click "App registrations"
- Click the "New registration" button
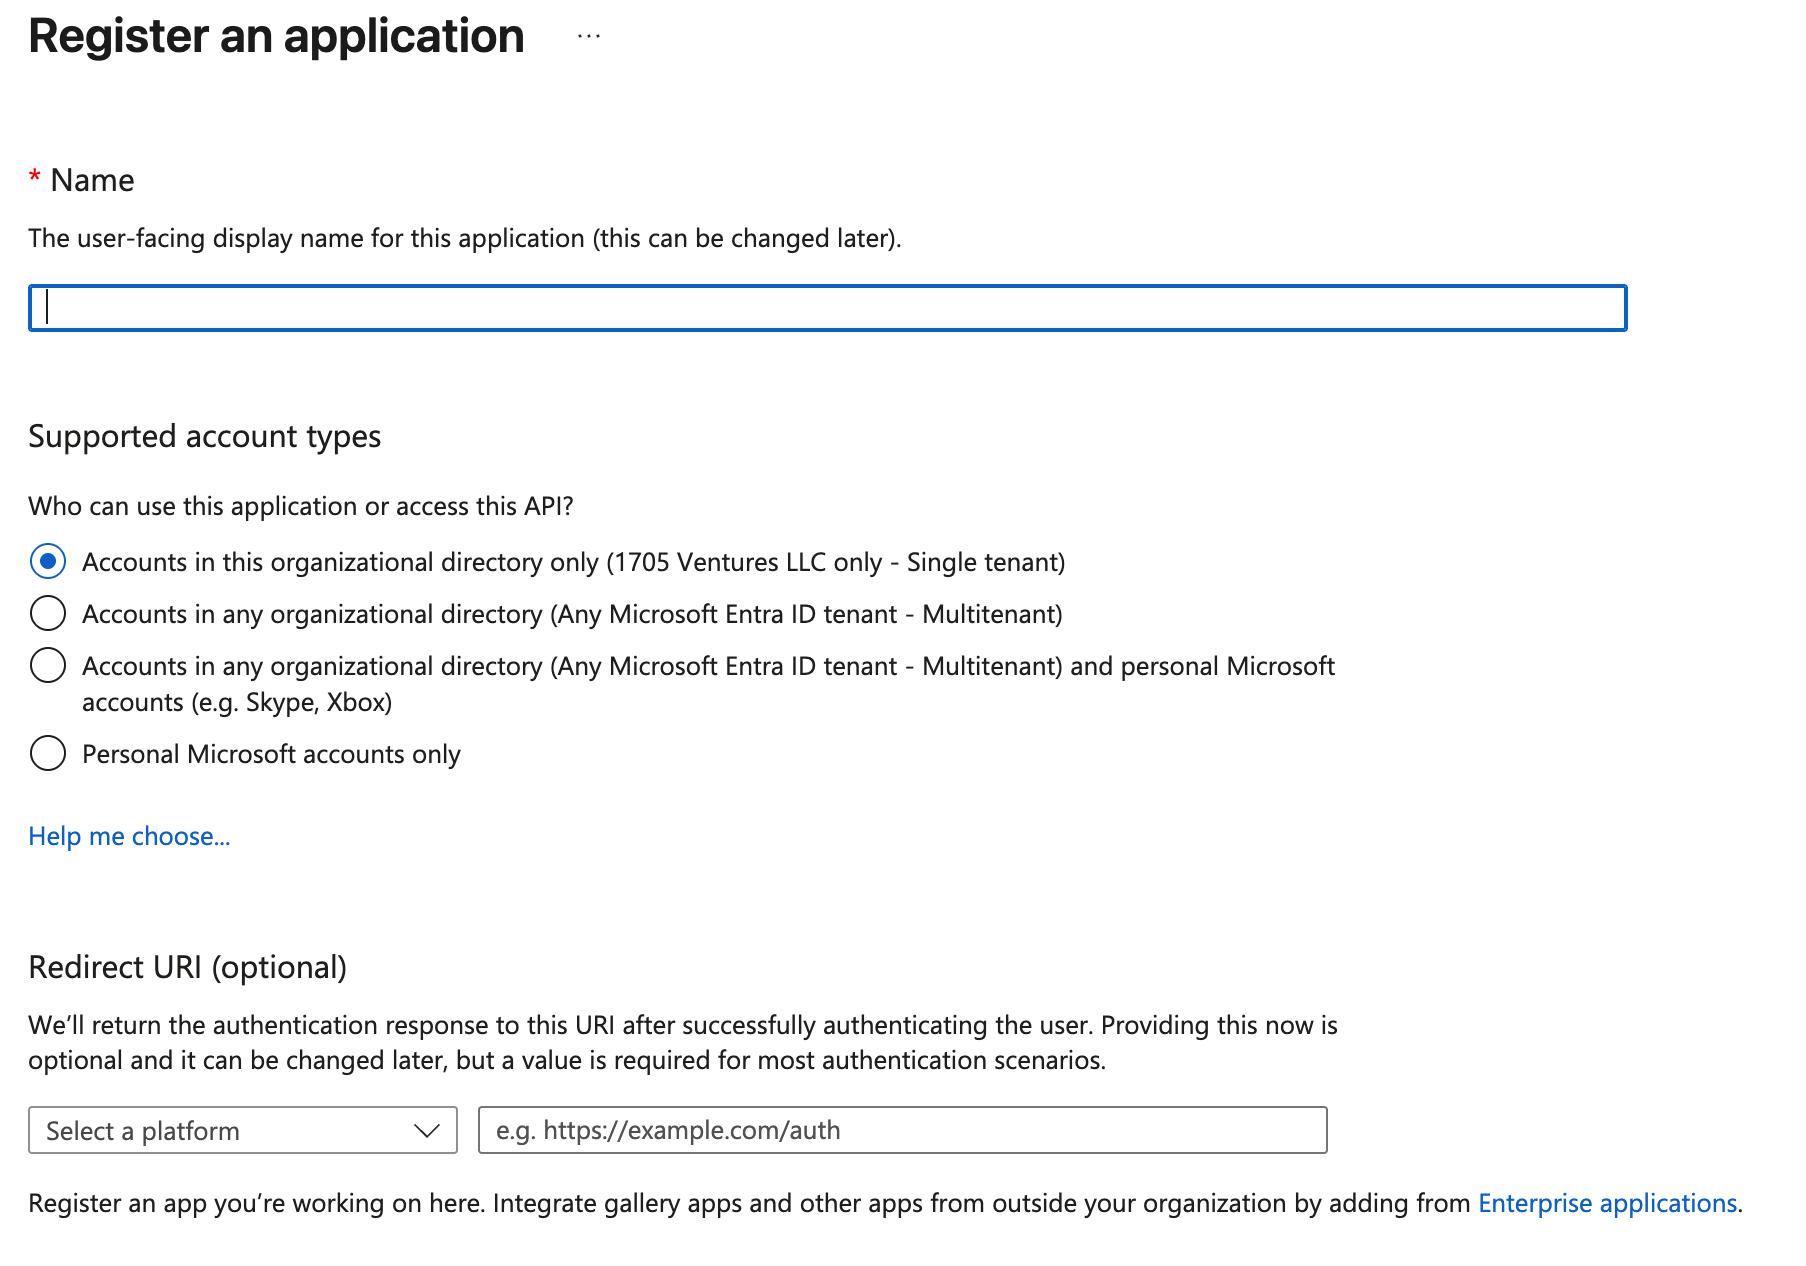
Configure Basic Registration Details
- Name: Enter a descriptive name for your application
Supported account types: Choose from:
- Accounts in this organizational directory only (single tenant) - Most common
- Accounts in any organizational directory (multi-tenant)
- Accounts in any organizational directory and personal Microsoft accounts
- Personal Microsoft accounts only
- Redirect URI (optional): Select platform type (Web, Public client, etc.) and enter the URI where Azure will redirect after authentication
Complete Registration
- Click "Register" to create the application
- Note the Application (client) ID and Directory (tenant) ID from the overview page
Step 2: Configure Application Settings
Authentication Settings
- Go to "Authentication" in the left menu
- Add
https://app.swiftcase.io as a URI
Certificates & Secrets
- Navigate to "Certificates & secrets"
- Create a client secret by clicking "New client secret"
- Provide a description and select expiration period
Important: Copy the secret value immediately as it won't be shown again
Step 3: Set API Permissions
Access API Permissions
- Click "API permissions" in the left navigation
- Review any default permissions (Microsoft Graph User.Read is typically included)
Add Required Permissions
- Click "Add a permission"
Choose the API type:
- Microsoft APIs: For Microsoft Graph, SharePoint, etc.
Configure Specific Permissions
- Select the API (e.g., Microsoft Graph)
Choose permission type:
- Application permissions: Act as the application itself
- Click "Add permissions"
Grant Admin Consent
- For application permissions and high privilege delegated permissions, admin consent is required
- Click "Grant admin consent for [your organization]"
- Confirm the consent grant
Step 4: Enter the Integration Settings in swiftcase.io
Configure Integration Settings
- In the upper right corner, open the menu and select "Settings"
- Click the "Integrations" tab, then "Microsoft Graph API"
- Enable the integration and enter the following required data:
- Tenant ID
- Client ID
- Client Secret
- Click "Test Connection" to validate and save. You will receive verification of permission state
Step 5: Test and Validate
Test a device
- Add a device known to be in Entra ID and Defender as an "Affected Asset" for an incident
- Once the device is validated, you should see visual confirmation

- Click the asset Action Menu and select "Get Device Info", you should see the "Comprehensive Microsoft Defender Security Analysis" dialog populated with device details
Test an identity
- Add an identity/email address known to exist in Azure AD as an "Affected Asset' for an incident
- Once the identity is validated, you should see visual confirmation

- Click the asset Action Menu and select "Get User Security Audit", you should see the "Microsoft Entra ID Security Audit" dialog populated with identity details
